
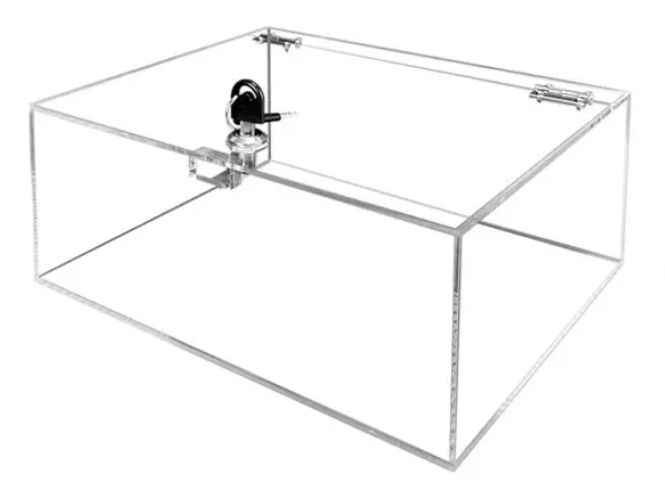
Acrylic boxes are widely used in many fields due to their transparent and aesthetic appearance, durability, and ease of processing. Adding a lock to an acrylic box not only enhances its security but also meets the need for item protection and privacy in specific scenarios. Whether it is used to store important documents or jewelry, or as a container to ensure the safety of goods in commercial displays, an acrylic box with a lock has unique value. This article will detail the complete process of making an acrylic box with a lock, helping you create a customized product that meets your needs.
Pre-production Preparations
(1) Material Preparation
Acrylic Sheets: Acrylic sheets are the core material for making the box.
Depending on the usage scenario and requirements, choose the appropriate thickness of the sheets.
Generally, for ordinary storage or display boxes, a thickness of 3 - 5 mm is more suitable. If it needs to carry heavier items or has higher strength requirements, 8 - 10 mm or even thicker sheets can be selected.
At the same time, pay attention to the transparency and quality of the sheets. High-quality acrylic sheets have high transparency, and no obvious impurities and bubbles, which can improve the overall aesthetics of the box.

Locks: The choice of locks is crucial as it directly relates to the box's security.
Common types of locks include pin-tumbler, combination, and fingerprint locks.
Pin-tumbler locks have a lower cost and are widely used, but their security is relatively limited.
Combination locks are convenient as they do not require a key and are suitable for scenarios with high demands for convenience.
Fingerprint locks offer higher security and provide a personalized unlocking method, often used for boxes storing high-value items.
Select a suitable lock according to actual needs and budget.
Glue: The glue used to connect acrylic sheets should be special acrylic glue.
This type of glue can bond well with acrylic sheets, forming a strong and transparent connection.
Different brands and models of acrylic glue may vary in drying time, bonding strength, etc., so choose according to the actual operation situation.
Other Auxiliary Materials: Some auxiliary materials are also needed, such as sandpaper for smoothing the edges of the sheets, masking tape which can be used to fix the position when bonding the sheets to prevent glue from overflowing, and screws and nuts. If the lock installation requires fixing, screws and nuts will play an important role.
(2) Tool Preparation
Cutting Tools: Common cutting tools include laser cutters. Laser cutters have high precision and smooth cutting edges, suitable for cutting complex shapes, but the equipment cost is relatively high.
Drilling Tools: If the lock installation requires drilling, prepare appropriate drilling tools, such as electric drills and drill bits of different specifications. The drill bit specifications should match the size of the lock screws or lock cores to ensure the accuracy of installation.
Grinding Tools: A cloth wheel polishing machine or sandpaper are used to grind the edges of the cut sheets to make them smooth without burrs, improving the user experience and product appearance quality.
Measuring Tools: Accurate measurement is the key to successful production. Measuring tools such as tape measures and square rulers are essential to ensure accurate sheet dimensions and perpendicular angles.
Designing the Acrylic Lock Box
(1) Determining the Dimensions
Determine the dimensions of the acrylic box according to the size and quantity of the items planned to be stored.
For example, if you want to store A4 documents, the internal dimensions of the box should be slightly larger than the size of an A4 paper (210mm×297mm).
Considering the thickness of the documents, leave some space. The internal dimensions can be designed as 220mm×305mm×50mm.
When determining the dimensions, consider the impact of the lock installation position on the overall dimensions to ensure that the normal use of the box is not affected after the lock is installed.
(2) Planning the Shape
The shape of the acrylic lock box can be designed according to actual needs and aesthetics.
Common shapes include squares, rectangles, and circles.
Square and rectangular boxes are relatively easy to make and have a high space utilization rate.
Circular boxes are more unique and suitable for display products.
If designing a box with a special shape, such as a polygon or an irregular shape, more attention should be paid to precision control during cutting and splicing.
(3) Designing the Lock Installation Position
The installation position of the lock should be considered in terms of both ease of use and security.
Generally, for a rectangular box, the lock can be installed at the connection between the lid and the box body, such as on one side edge or in the center of the top.
If a pin-tumbler lock is selected, the installation position should be convenient for inserting and turning the key.
For combination locks or fingerprint locks, the visibility and operability of the operation panel need to be considered.
At the same time, ensure that the thickness of the sheet at the lock installation position is sufficient to ensure a firm installation.
Customize Your Acrylic Box with a Lock Item! Choose from custom size, shape, color, printing & engraving options.
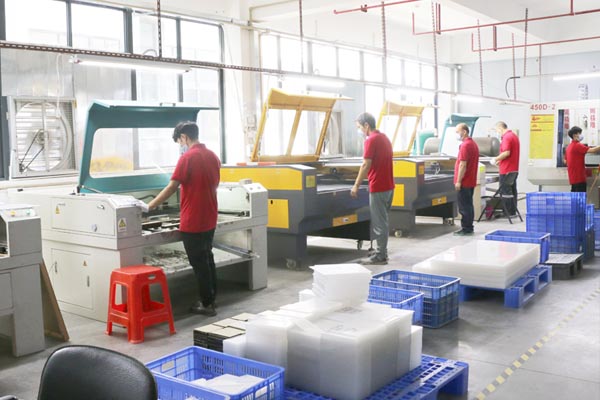
As a leading & professional acrylic products manufacturer in China, Jayi has more than 20 years of custom acrylic box production experience! Contact us today about your next custom acrylic box with a lock project and experience for yourself how Jayi exceeds our customers' expectations.
Cutting Acrylic Sheets
Using a Laser Cutter
Preparation Work: Draw the designed box dimensions and shapes through professional drawing software (such as Adobe Illustrator) and save them in a file format recognizable by the laser cutter (such as DXF or AI). Turn on the laser cutter equipment, ensure that the equipment is running normally, and check the parameters such as the focal length and power of the laser head.
Cutting Operation: Place the acrylic sheet flat on the workbench of the laser cutter and fix it with fixtures to prevent the sheet from moving during cutting. Import the design file and set appropriate cutting speed, power, and frequency parameters according to the thickness and material of the sheet. Generally, for 3 - 5 mm thick acrylic sheets, the cutting speed can be set at 20 - 30mm/s, the power at 30 - 50W, and the frequency at 20 - 30kHz. Start the cutting program, and the laser cutter will cut the sheet according to the preset path. During the cutting process, closely monitor the cutting situation to ensure the cutting quality.
Post-cutting Treatment: After cutting, carefully remove the cut acrylic sheet. Use sandpaper to slightly grind the cutting edges to remove possible slag and burrs, making the edges smooth.
Installing the Lock
(1) Installing a Pin - tumbler Lock
Determining the Installation Position: Mark the positions of the screw holes and the lock core installation hole on the acrylic sheet according to the designed lock installation position. Use a square ruler to ensure the accuracy of the marked positions, and that the hole positions are perpendicular to the surface of the sheet.
Drilling: Use a drill bit of the appropriate specification and drill holes at the marked positions with an electric drill. For the screw holes, the diameter of the drill bit should be slightly smaller than the diameter of the screw to ensure a firm installation of the screw. The diameter of the lock core installation hole should match the size of the lock core. When drilling, control the speed and pressure of the electric drill to avoid overheating of the drill bit, damaging the sheet, or causing irregular holes.
Installing the Lock: Insert the lock core of the pin-tumbler lock into the lock core installation hole and tighten the nut from the other side of the sheet to fix the lock core. Then, install the lock body on the sheet with screws, ensuring that the screws are tightened and the lock is firmly installed. After installation, insert the key and test whether the opening and closing of the lock are smooth.
(2) Installing a Combination Lock
Installation Preparation: A combination lock usually consists of a lock body, an operation panel, and a battery box. Before installation, carefully read the installation instructions of the combination lock to understand the installation methods and requirements of each component. Mark the installation positions of each component on the acrylic sheet according to the dimensions provided in the instructions.
Component Installation: First, drill holes at the marked positions for fixing the lock body and the operation panel. Fix the lock body on the sheet with screws to ensure that the lock body is firmly installed. Then, install the operation panel at the corresponding position, connect the internal wires correctly, and pay attention to the correct connection of the wires to avoid short circuits. Finally, install the battery box, install the batteries, and power the combination lock.
Setting the Password: After installation, follow the operation steps in the instructions to set the unlocking password. Generally, press the set button first to enter the setting mode, then enter the new password and confirm to complete the setting. After setting, test the password unlocking function several times to ensure that the combination lock works normally.
(3) Installing a Fingerprint Lock
Installation Planning: Fingerprint locks are relatively complex. Before installation, have a clear understanding of their structure and installation requirements. Since fingerprint locks usually integrate fingerprint recognition modules, control circuits, and batteries, enough space needs to be reserved on the acrylic sheet. Design appropriate installation slots or holes on the sheet according to the size and shape of the fingerprint lock.
Installation Operation: Use cutting tools to cut the installation slots or holes on the sheet to ensure accurate dimensions. Install each component of the fingerprint lock at the corresponding positions according to the instructions, connect the wires, and pay attention to waterproof and moisture-proof treatment to avoid water entering and affecting the normal operation of the fingerprint lock. After installation, perform the fingerprint enrollment operation. Follow the prompt steps to enroll the fingerprints that need to be used in the system. After enrollment, test the fingerprint unlocking function several times to ensure the stable performance of the fingerprint lock.
Assembling the Acrylic Lock Box
(1) Cleaning the Sheets
Before assembly, wipe the cut acrylic sheets with a clean cloth to remove dust, debris, oil stains, and other impurities on the surface, ensuring that the sheet surface is clean. This helps to improve the bonding effect of the glue.
(2) Applying Glue
Evenly apply acrylic glue to the edges of the sheets that need to be bonded. When applying, you can use a glue applicator or a small brush to ensure that the glue is applied with a moderate thickness, avoiding situations where there is too much or too little glue. Excessive glue may overflow and affect the appearance of the box, while too little glue may result in weak bonding.
(3) Splicing the Acrylic Sheets
Splice the glued sheets according to the designed shape and position. Use masking tape or fixtures to fix the spliced parts to ensure that the acrylic sheets are closely fitted and the angles are accurate. During the splicing process, pay attention to avoiding the movement of the acrylic sheets, which may affect the splicing accuracy. For larger-sized acrylic boxes, the splicing can be carried out in steps, first splicing the main parts and then gradually completing the connection of other parts.
(4) Waiting for the Glue to Dry
After splicing, place the box in a well-ventilated environment with a suitable temperature and wait for the glue to dry. The drying time of the glue varies depending on factors such as the type of glue, environmental temperature, and humidity. Generally, it takes several hours to one day. Before the glue is completely dry, do not move or apply external force casually to avoid affecting the bonding effect.
Post-processing
(1) Grinding and Polishing
After the glue is dry, further grind the edges and joints of the box with sandpaper to make them smoother. Start with coarse-grained sandpaper and gradually transition to fine-grained sandpaper to obtain a better grinding effect. After grinding, you can use polishing paste and a polishing cloth to polish the surface of the box, improving the gloss and transparency of the box and making its appearance more beautiful.
(2) Cleaning and Inspection
Use a cleaning agent and a clean cloth to thoroughly clean the acrylic locking box, removing possible glue marks, dust, and other impurities on the surface. After cleaning, conduct a comprehensive inspection of the lock box. Check whether the lock works normally, whether the box has good sealing, whether the bonding between the sheets is firm, and whether there are any defects in the appearance. If problems are found, repair or adjust them promptly.
Common Problems and Solutions
(1) Uneven Sheet Cutting
The reasons may be improper selection of cutting tools, unreasonable setting of cutting parameters, or movement of the sheet during cutting. The solution is to choose the appropriate cutting tool according to the thickness and material of the sheet, such as a laser cutter or a suitable saw and correctly set the cutting parameters. Before cutting, ensure that the sheet is firmly fixed and avoid external interference during the cutting process. For sheets that have been cut unevenly, grinding tools can be used for trimming.
(2) Loose Lock Installation
The possible reasons are improper selection of the lock installation position, inaccurate drilling size, or insufficient tightening force of the screws. Re-evaluate the lock installation position to ensure that the thickness of the sheet is sufficient to support the lock. Use a drill bit of the appropriate specification to drill holes to ensure accurate hole dimensions. When installing the screws, use the appropriate tool to ensure that the screws are tightened, but do not over-tighten to avoid damaging the acrylic sheet.
(3) Weak Glue Bonding
The possible reasons are improper selection of the lock installation position, inaccurate drilling size, or insufficient tightening force of the screws. Re-evaluate the lock installation position to ensure that the thickness of the sheet is sufficient to support the lock. Use a drill bit of the appropriate specification to drill holes to ensure accurate hole dimensions. When installing the screws, use the appropriate tool to ensure that the screws are tightened, but do not over-tighten to avoid damaging the acrylic sheet.
Conclusion
Making an acrylic box with a lock requires patience and care. Every step, from material selection, and design planning to cutting, installation, assembly, and post-processing, is crucial.
By reasonably choosing materials and tools, and carefully designing and operating, you can create a high-quality acrylic box with a lock that meets your personalized needs.
Whether it is used for personal collection, commercial display, or other purposes, such a customized acrylic box can provide a safe and reliable storage space for items, while showing unique aesthetics and practical value.
I hope the methods and steps introduced in this article can help you successfully make the ideal acrylic box with a lock.
Post time: Feb-18-2025